
Room thermostats
Techno RT V
Discontinued This product is no longer on sale. The manual remains available for existing owners.
- Code 578122
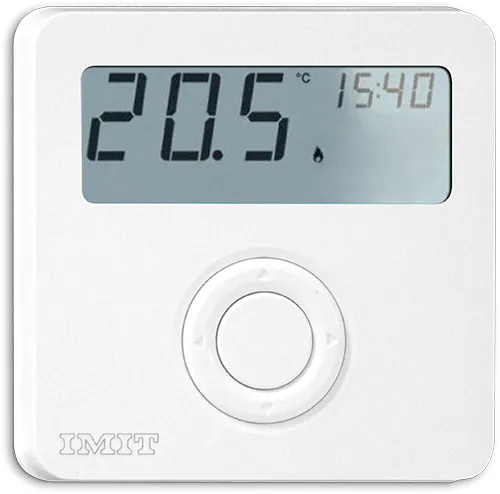
Product description
This product is manufactured in accordance with standards EN 60730-2-9, ETSI EN 301 489-1 (RT R, RT VR), ETSI EN 300 200-2 (RT R, RT VR), in accordance with applicable EC directives and it is entirely manufactured in Italy.
Warning
WARNING! It is recommended to install the device in strict accordance with the safety regulations and laws in force. Before making any connection, make sure that the main switch is off.
Technical specifications
- Power supply
- 230Vac, 50Hz - Output: relay ON-OFF
- Maximum power absorbed
- < 0.5W
- Maintenance of clock in the absence of supply voltage
- >12h
- Maximum capacity of the contacts
- 5A(1A) 250VAC
- Type of action
- 1B
- Class
- ErP I (+1%) - EU 811/2013
- Maximun ambient temperature
- 50°C
- Temperature display range
- 0°C÷39°C
- Temperature regulation range
- 5°C÷35°C
- Temperature resolution
- 0,1°C
- Temperature probe
- NTC 100KΩ@25°C
- Temperature differential
- from 0.1°C to 2.0°C (standard 0.2°C)
- Degree of protection
- IP20
- Insulation class
- Type II (double insulation)
- Pollution degree
- 2
- Software
- class A
- Heat and fire resistance
- Category D
- Storage temperature
- -25÷60°C
- Rated impulse withstand voltage
- 2,5kV
- Installation
- wall-mounting
Installation

Install the device away from heat sources and drafts, about 1.5m from the floor. Open the device by pressing the small tab on the underside of the base (Fig.1 A). Turn the front panel upwards (Fig.1 B) and lift it slightly to release it (Fig.1 C).

Remove the internal protection covering the terminals by unscrewing the screw (Fig.2 C) and turning the cover upwards. Attach the base to the wall, using the horizontal (Fig.2 A-A) or diagonal distance (Fig.2 B-B).

Insert the cables through the opening at the bottom and connect them to the terminal board (Fig.4) then replace the internal cover and tighten the screw (Fig.2 C).
To close the device, proceed as before but reversing the sequence of operations: match the upper sides of the two parts (Fig.1 C) then turn the front panel downwards (Fig.1 B) until the lower hook clicks (Fig.1 A) on the base.
Description of controls and operation
The controls consist of a ring with four positions identified by the arrows 


 with a central button OK. Press the ring in correspondence with the arrow to activate one button at a time. Press the OK button in the centre. Use the arrow buttons to change the time and temperature values or to select the options, the central OK button usually confirms the settings.
FIRST START-UP (Fig. 5)

Set the clock
- Set the format 24H or 12H using , then OK.
- Set the hour using , then OK.
- Set the minutes using , then OK.
- OFF and the clock appear on the display.
OFF MODE (Fig.6)

The antifreeze function is active.
Press for 3 seconds:
to set the clock (as above).
to set the season mode Summer/Winter (standard: WINTER).
to go from OFF to ON and vice versa.
Press OK for 10 seconds to enter the Installer Menu.
ON MODE (Fig.7)

The ambient temperature measured is always in the foreground.
Press OK to display the clock or the set temperature in the top right corner. Press to select the temperature Comfort (standard) or Economy (ECO). Press to change the set and stored values.
Standard Comfort : WINTER = 20.0°C / SUMMER = 25.0°C
Standard ECO : WINTER = 16.0°C / SUMMER = 28.0°C
WINTER MODE 
The Comfort temperature is higher than the Economy temperature (t1>t2). When Tamb < Tset (Room temperature < Set temperature), the heating is activated  .
Modo stagione estate
The Comfort temperature is lower than the Economy temperature (t1<t2). When Tamb > Tset (Room temperature > Set temperature), the cooling is activated  .
INSTALLER MENU (Fig.9)

On OFF mode, press OK for 10 seconds to enter the Installer Menu. Press to select the options;
Press to change the values;
- AF = Antifreeze threshold (standard 6.0°C);
- HYS = Temperature differential (standard 0.2°C);
- OFS = Temperature offset correction (standard 0.0°C);
- °C = Select degrees Celsius/Fahrenheit (standard Celsius);
- CLR = Press to select YES and confirm by pressing again.
- Wait 4 seconds for the automatic reset. Reset factory values.
Press OK to exit the installer menu.
Manual printed from https://man.imit.it/en/techno-rt-v/