Product description
-
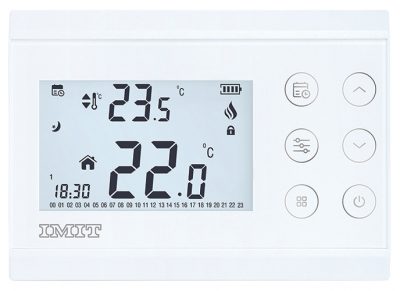
Silver CR is a wired room thermostat. The user can adjust the room
thermostat with the required temperature and get more comfortable
and economic heating.- Daily and Weekly Program (7×24)
- Different Mode Options (Comfort, Economy, Holiday)
- Sensitive temperature measuring
- Heating calibration
- ON/OFF Control
- Wired Connection
DECLARATION OF CONFORMITY
Compatible Directives: Radio and Telecommunications Terminal Equipment Regulation 2014/53/EU (R&TTE/RED EN 301 489-1 V2.1.1:2017, EN 300 220-1V3.1.1:2017, EN 301 489-3 V2.1.1:2017, EN 300 220-2 V3.1.1:2017, EN 62479: 2010, EN 60730-2-9:2010, EN 60730-1:2011) Electromagnetic Compatibility Regulation 2014/30/EU (EMC EN 61000-6-3: 2007 + A1: 2011, EN 61000-6-1: 2007
Technical specifications
-
Power supply 3 Vdc (2 x AAA alkaline battery
Battery life 1 Year (2 x AAA)
Maximum capacity of the contacts 2A (30 Vdc)
Temperature display range -10°÷50°C
Temperature regulation range 5°÷30°C
Temperature resolution 0,3°C
Storage temperature -20°÷60°C
Temperature precision 0,1°C
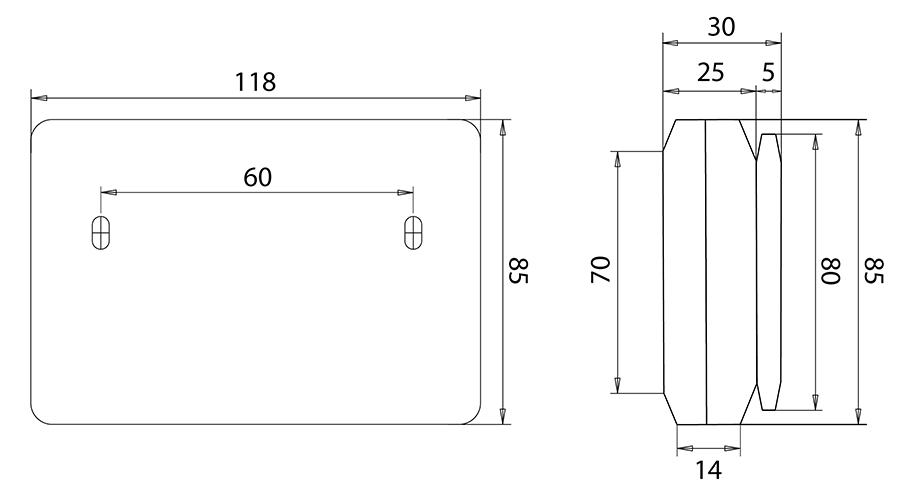
Dimensions 85mm / 119.5mm / 24mm
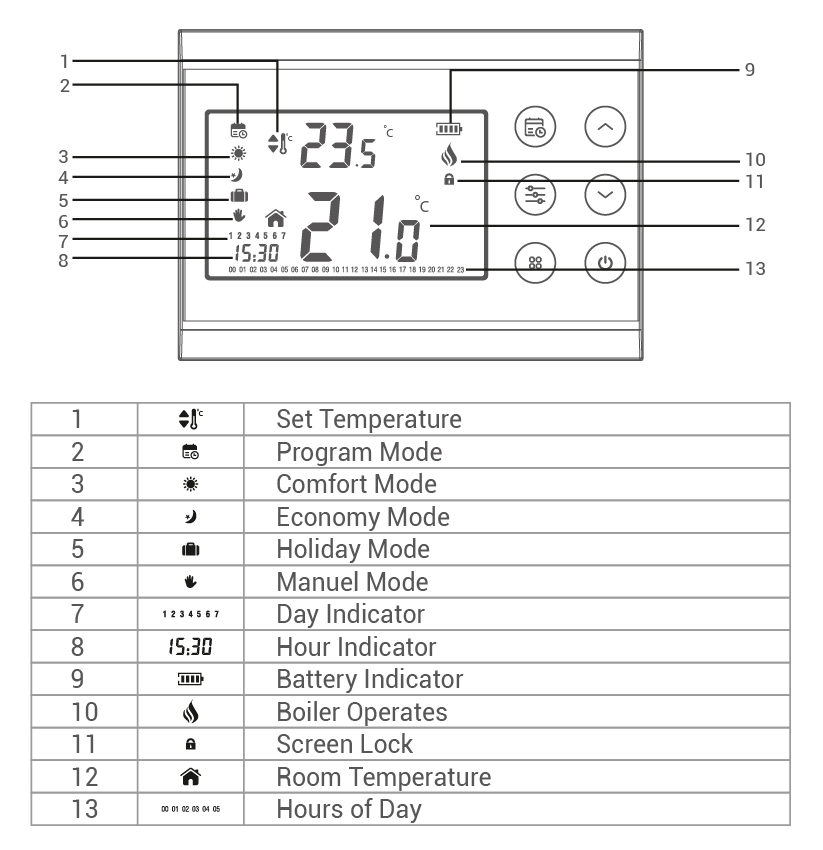
Thermostat control keys
-
Buttons Functions
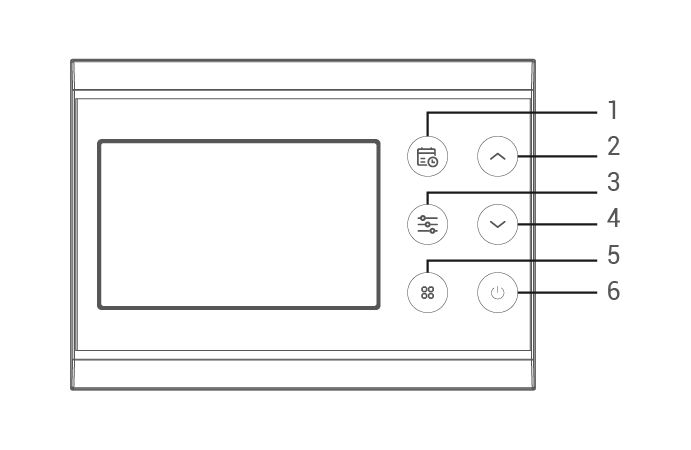
- Weekly Program Button
- Temperature Adjustment (To Increase)
- Settings Button
- Temperature Adjustment(To Decrease)
- Mode Button
- On/Off Button
Screen Indicators
Installation
-
ROOM THERMOSTAT PLACEMENT
Room thermostat needs to placed in the room which is used most
frequently. For instance; living room or lounge. Placing the room
thermostat in a spot that have air circulation like entrance of a room
or side of window should be avoided. Also anywhere close to heating
units such as radiator, stove and spots which get direct sun light
would not be suitable place. Room thermostat needs to be located
above the floor between 50 cm – 150 cm height. Few trials may be
made to find the most convenient spot.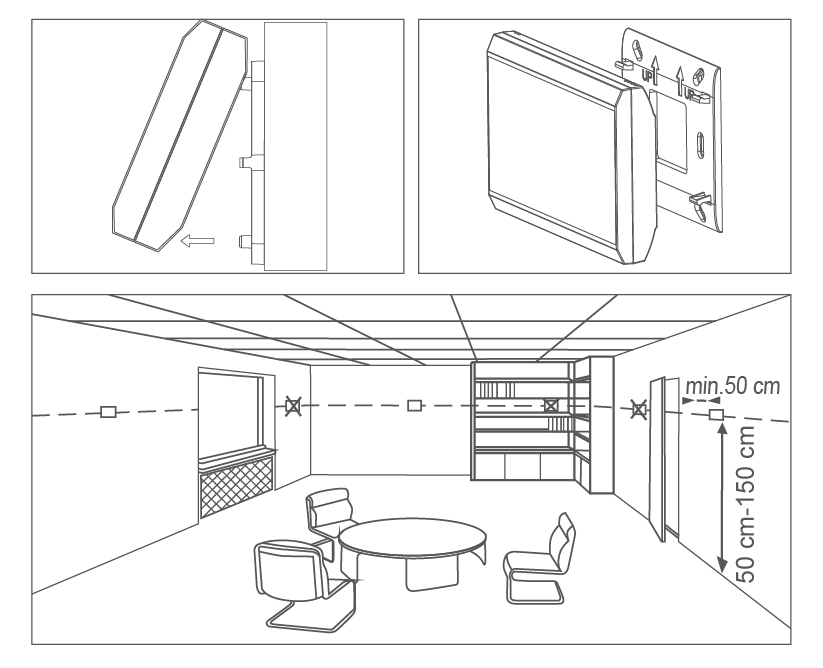
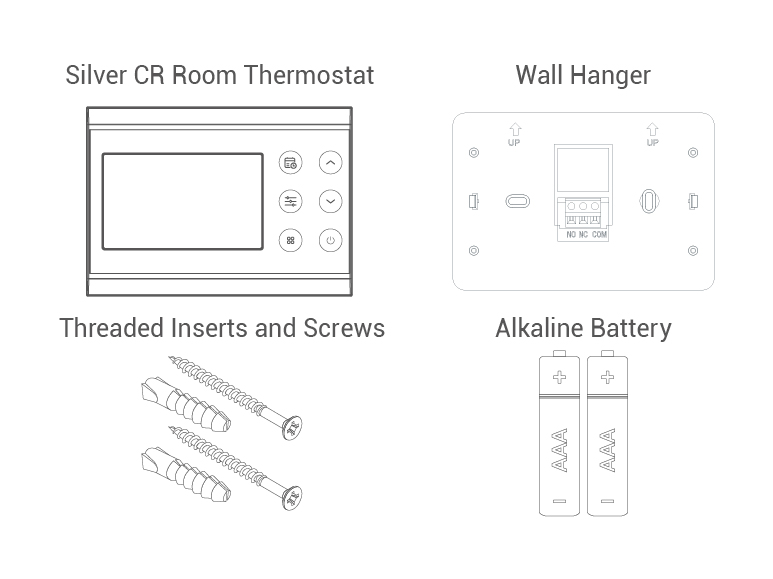
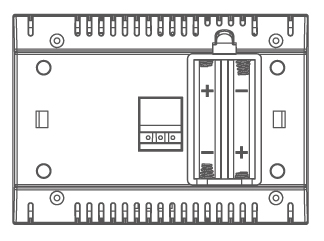
BATTERY PLACEMENT
Remove your room thermostat from Wall hanger. Then remove the battery housing from the back side of thermostat. Put 2 alkaline batteries in to battery housing. Please be sure about the directions of batteries. Hang your thermostat on the Wall hanger after assemble battery housing back. Change the both batteries together.
Warning:
When the product is not used for a long time (more than 15 days), remove the batteries. Otherwise, malfunctions that will occur are out of warranty.
Warning!
Please throw away dead batteries to trashes which specially made for batteries.
THERMOSTAT WIRING DIAGRAM
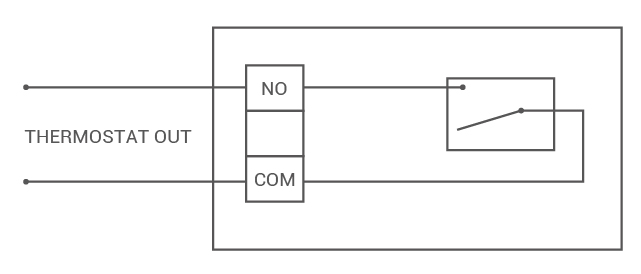
Warning!
Only people who have got Professional Competence should make operations of electric wiring or boiler setup.
Description of controls and operation
-
ROOM THERMOSTAT HEATING CALIBRATION
Temperature sensors which are used in room thermostats, are highly sensitive. No other thermometers in your living area have that much sensitivity. so you may need to calibrate your room thermostat if you would like to get the same temperature degrees with other thermometers in your living space.
- When the device has ”Off ” status ”On/”Off” button needs to be pressed for 3 seconds.
- From the calibration menu which appeared, you may set to any temperature degree by pressing ”Adjustment Buttons”.T his value can be arranged between ”-8°C and +8°C”
- To exit calibration menu please press ”On/Off’ button once.
Note: Recommended temperature calibration is “0.0°C”.
KEY LOCK
In room thermostat there is a key lock function to avoid any unintended contact.
- In order to unlock the thermostat’s key lock ” Mode” button should be pressed for 3 seconds.If buttons on thermostat are not touched for 10 seconds, key lock will be reactivated.
DAY AND HOUR SETTINGS
- While your thermostat is On, keep pressing ”Settings” button for 3 seconds.
- At the first screen that appears ”Hour” part will be blinking. You may set the time with ‘Up’ and ‘Down’ buttons.
- After set the time, ”Settings” button needs to be pressed once. For minute setting, minute part will be blinking. You may set the minute with ‘Up’ and ‘Down’ buttons.
- After set the minute, “Settings” button needs to be pressed once to set the day of week.
- Days of every week begins with Monday so if you see 1 on the screen it means Monday is chosen. Likewise 2 would be Tuesday, 3-Wednesday, 4-Thursday, 5-Friday, 6-Saturday and 7-Sunday.
- When setting is done you may exit by pressing for 3 seconds to ”Settings” button.
MODE SETTINGS
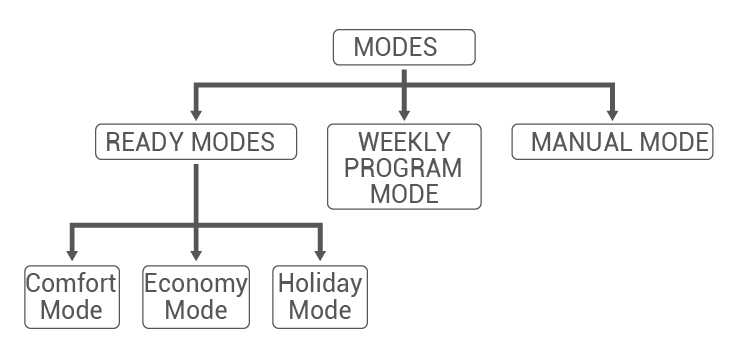
Your room thermostat has got 5 different modes. 3 of them (Comfort,Economy and Holiday Mode) are prepared and constant modes. Other modes are manual mode and weekly program mode.
In prepared modes, temperature degrees are based on user’s choices which has been set in the beginning. Manual mode provides to operate the thermostat with temperature which user’s required and set directly. Weekly program mode provides to keep operate the thermostat with weekly program which user’s set.
- Temperature degrees of prepared modes can be changed on ”Settings” menu.
- In order to go to ”Settings” menu,”Settings” button needs to be pressed for 3 seconds. Date and time settings would appear in first screen, to skip it ”Settings” button should be pressed for 3 times. Comfort Mode’s temperature degree would appear and temperature for Comfort Mode can be adjusted by pressing ”Up” and ”Down” buttons.
- When setting is done, by pressing ”Settings” button other modes (Economy and Holiday Mode) can be set.
- Pressing ”Settings” button for 3 seconds again would close ‘Settings’ screen.
- Manual mode temperature can be set by pressing ”Up” and ”Down” buttons while on home screen.
- When ”Up” or ”Down” buttons are pressed thermostat will be set on Manual Mode.
- In order to change to Mode settings you may press ”Mode” button.
PROGRAM MODE
You can adjust the weekly operating modes of your room thermostat separately for each hours per day under favour of weekly program. Weekly program mode includes 2 active modes. They are “Comfort Mode” and “Economy Mode”
- In order to arrange the weekly program ”Program Mode” button needs to be pressed for 3 seconds. On the screen there will be icons for the day which wants to be programmed, hours of the day and active mode. The hour which will be programmed will be blinking.
- By pressing ”Mode” button, chosen mode for that specific hour may be changed.
- ”Up” and ”down” button would allow you to change the chosen time frame and up to the active it can be programmed.
- While setting the weekly program to change the date ”Settings” button should be pressed.
- When weekly program is chosen on screen or while setting weekly program, if the hours on the screen is blinking, it means that the chosen hours set on ”Comfort” mode. If the hour is not blinking then chosen mode is ”Economy”mode. As for blinking hour means active current time.
- After scheduling the weekly program to register it ”Program Mode” button needs to be pressed for 3 seconds.