Product description
-
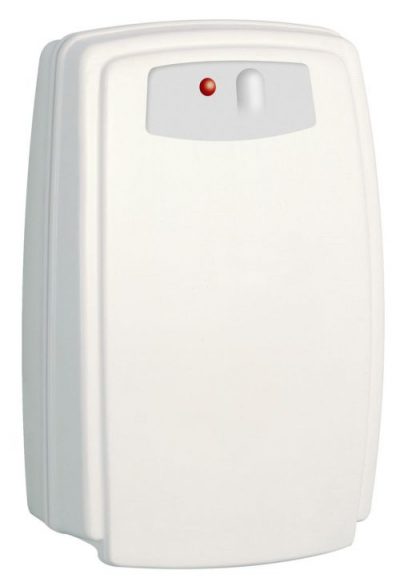
This device, paired with a thermostat/timer of the line Techno R (radio), allows to control a unit (boiler, valve, pump, etc.) depending on the ambient temperature detected.
This product is designed according to EN 60730-2-9 and EN60730-2-7, ETSI EN 301 489-1, ETSI EN 300 200-2 standards, in compliance with the applicable EC directives, and made in Italy.
ATTENTION! We strictly recommend to install this device according to the safety regulations in force in the European Community and local countries.
The mains circuit breaker must be off before carrying out any electrical connections.In case of persistent faults, do not tamper with the product but con-tact Technical Support.
Technical specifications
-
Power supply 230Vac, 50Hz
Maximum power absorbed 2W
Maximum capacity of the contacts 5A(1A) 250VAC
Operating frequency 868.2 Mhz
Duty cycle of the transmitter < 1%
Capacity 300 m outdoors, 20 m indoors
Type of antenna internal, with stiff wire
Maximun ambient temperature 50°C
Degree of protection IP20
Insulation class Type II (double insulation)
Pollution degree 2
Software class A
Heat and fire resistance Category D
Storage temperature -25÷60°C
Rated impulse withstand voltage 2,5kV
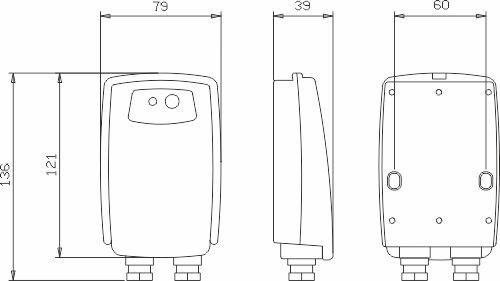
Installation on wall
External sensor input (optional) NTC 10KΩ@25°C
Installation
-
Install the receiver away from electromagnetic fields (TV, PC, refrigerators, etc.) that may interfere with its correct operation.
STANDARD WALL INSTALLATION
- remove the round dowels on the wall at the bottom of the base and mount the cable glands (fig.2);
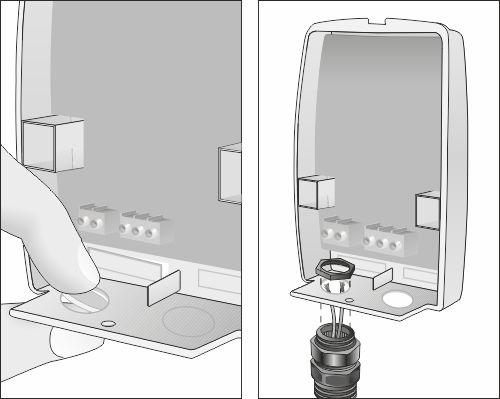
Fig. 2 - secure the device to the wall with two screws (fig.4);
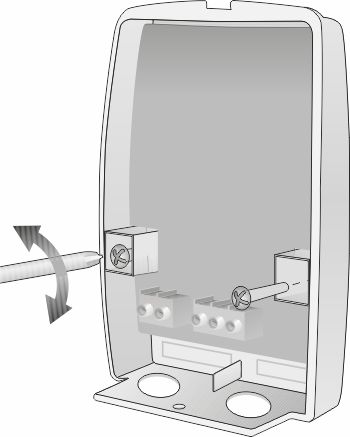
Fig. 4 - insert the cable of the load to drive and connect the cables to the RELAY terminals (fig.5);
- insert the supply cable and connect L, N to the terminals 230Vac (fig.5);
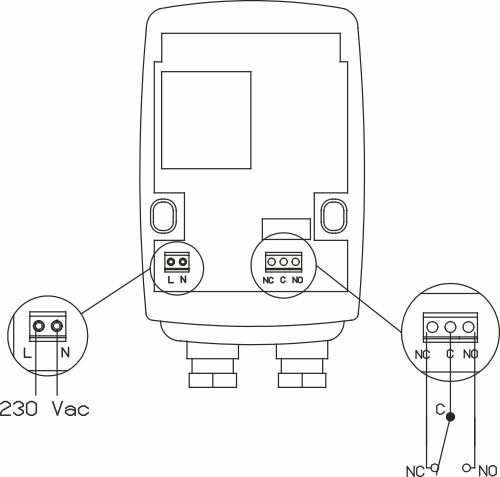
Fig. 5 - replace the cover on the base (fig.6).
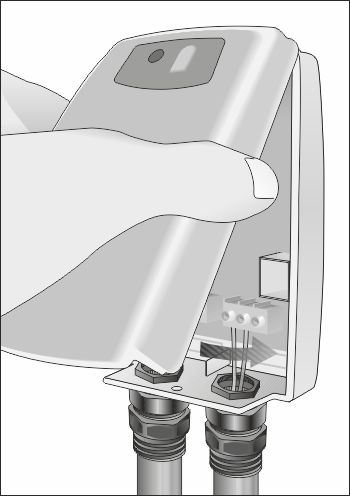
Fig. 6 ALTERNATIVE INSTALLATION, ON BUILT-IN BOX ON WALL:
- remove the rectangular dowels on the back wall of the base and insert the cables (fig.3);
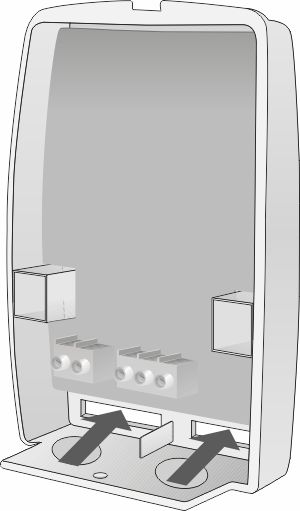
Fig. 3 - secure the device to the wall with two screws (fig.4);
Fig. 4 - connect the supply cables to the terminals 230Vac and those of the load to drive to the RELAY terminals (fig.5);
Fig. 5 - replace the cover on the base (fig.6).
Fig. 6 Description of controls and operation
-
PAIRING WITH A DEVICE OF THE LINE TECHNO R (Fig. 7)
The receiver is already paired at the factory with the corresponding Techno device. Should it be necessary to repeat the operation, proceed as follows taking care to operate with a single pair at the time: each receiver can be paired with one Techno device only.
Power the receiver device and proceed to pair it with the Techno device.- Press button A for about 5 seconds until the LED B turns on and turns red to indicate that the procedure is in progress.
- Follow the instructions of the Techno device to activate the pairing procedure with the receiver.
- Wait for the LED B to become flashing green, the pairing procedure is complete.
- After 5 seconds after the procedure has been completes, the LED B becomes fixed green and the receiver is ready.
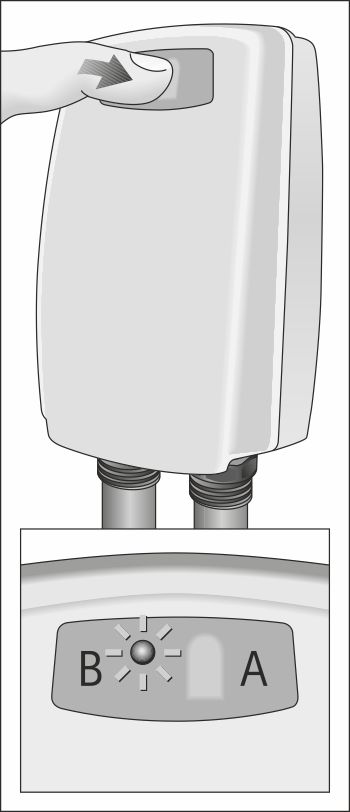
Fig. 7
To verify the correct operation of the system, on the transmitter:
Winter mode: set a temperature higher than the temperature detected and make sure that the symbol on the display turns on.
Summer mode: set a temperature lower than the temperature detected and make sure that the symbol on the display turns on.
Check the tripping of the relay on the receiver and the activation of the controlled load.LED SIGNALS (Fig.7)
Off: receiver off
Fixed green: receiver active
Fixed red: receiver pairing with Techno device
Flashing green: pairing complete
Flashing green/red: the communication with the Techno device has been interrupted for more than an hour. The load is not active. Normal operation is restored automatically when the radio communication is reactivated.Fig. 7 Problem solving
-
Problem
The receiver does not turn on
Possible causeSolution- Check the connections of the power supply to the terminals
ProblemThe system does not turn on correctly
Possible causeSolution- Check the settings of the Techno device paired;
- Check the connections of the load to the terminals of the receiver.
ProblemCommunication problems between the receiver and the transmitter
Possible causeSolution- Try changing the position of the receiver.